I did not trust jarred garlic in a sauce. That sounds dramatic, I know. But for years, I was convinced that pre-minced garlic from a jar carried this faint, sour note that ruined anything it touched. So when my neighbor Marie dropped off a container of what she called “bright garlicky roasted tomato basil sauce” and mentioned she used the jarred stuff because her hands were bothering her, I smiled, thanked her, and mentally prepared myself for a polite lie. Then I took a bite. And then another. And then I stood at my kitchen counter eating it straight from the container with a spoon, trying to figure out what kind of sorcery had just happened. The garlic was there, sure, but it wasn’t harsh or weirdly acidic. It was mellow, almost sweet, and it wrapped around the tomatoes like they’d been best friends forever.
I had to know what she did. So I called her, and she laughed at me. “Roast it,” she said. “You roast the garlic with the tomatoes. It changes everything.” And she was right. That one step—roasting the garlic cloves whole alongside the tomatoes—completely transforms the flavor. The sharpness disappears, and what’s left is this deep, caramelized sweetness that somehow still tastes fresh and bright. I’ve made this sauce at least a dozen times since that day, tweaking the ratios and testing different basil varieties, and I can say with total honesty that this is the version I keep coming back to. It’s the one that made me stop judging jarred garlic. Mostly.
This bright garlicky roasted tomato basil sauce is the kind of recipe that feels like a secret. It’s simple enough for a Tuesday night pasta dinner but impressive enough to serve to guests who will absolutely ask for the recipe. And the best part? It comes together with almost no active work. The oven does the heavy lifting, and you just get to enjoy the smell of roasted tomatoes filling your kitchen.
Why You’ll Love This Recipe
Let me be honest with you. I have tested a lot of tomato sauces in my time. Some are too acidic. Some are too sweet. Some taste like they came from a can, even when they didn’t. This one is different. Here’s why it stands out:
- Seriously Bright Flavor — The roasting process concentrates the tomatoes’ natural sweetness while keeping their acidity intact. You get this beautiful balance that doesn’t need a pinch of sugar to fix.
- Garlic That Actually Works — Roasting whole garlic cloves with the tomatoes mellows them into something buttery and almost nutty. No harsh raw garlic bite, just pure savory goodness.
- Minimal Hands-On Time — The oven does most of the work. You toss everything on a sheet pan, roast it, then blend it. That’s it. I’ve made this while helping my kid with homework and folding laundry.
- Pantry-Friendly Ingredients — You probably already have most of these things. Canned tomatoes, fresh garlic, olive oil, basil. Nothing fancy required.
- Incredibly Versatile — Use it on pasta, spread it on sandwiches, spoon it over grilled chicken, or dip crusty bread into it. It works for everything.
- Freezer-Friendly — Make a double batch and stash some for busy nights. It thaws beautifully and tastes just as fresh.
This isn’t just another tomato sauce recipe. It’s the one that made my husband ask if I’d secretly taken a cooking class. It’s the one that turns a simple bowl of spaghetti into something that feels special without any extra stress. And honestly, it’s the kind of recipe that makes you feel like a really good cook, even on days when you don’t have the energy to be one.
What Ingredients You Will Need
This recipe keeps things simple. The ingredients list is short, but each one plays an important role in building that bright, garlicky flavor. Here’s what you’ll need:
For the Roasted Base
- 2 cans (28 ounces each) whole peeled tomatoes — I recommend San Marzano tomatoes if you can find them. They’re sweeter and less acidic than standard canned tomatoes. But regular whole peeled tomatoes work great too. Drain them well, but reserve about a quarter cup of the liquid for blending.
- 8 to 10 cloves garlic, peeled — Leave them whole. You’re going to roast them, and they’ll soften into something almost spreadable. If your garlic cloves are huge, you can cut them in half so they roast evenly.
- 3 tablespoons extra virgin olive oil — Use a good quality one here. It’s a major flavor component, so don’t skimp. I like California Olive Ranch for everyday cooking.
- 1 teaspoon kosher salt — Plus more to taste at the end. Kosher salt dissolves more evenly than table salt and gives you better control.
- 1/2 teaspoon black pepper — Freshly ground is best. Pre-ground pepper loses its punch over time.
- 1 tablespoon tomato paste — This adds depth and richness. It’s optional, but I never skip it. I prefer Amore brand in the tube because it stays fresh in the fridge.
For Finishing
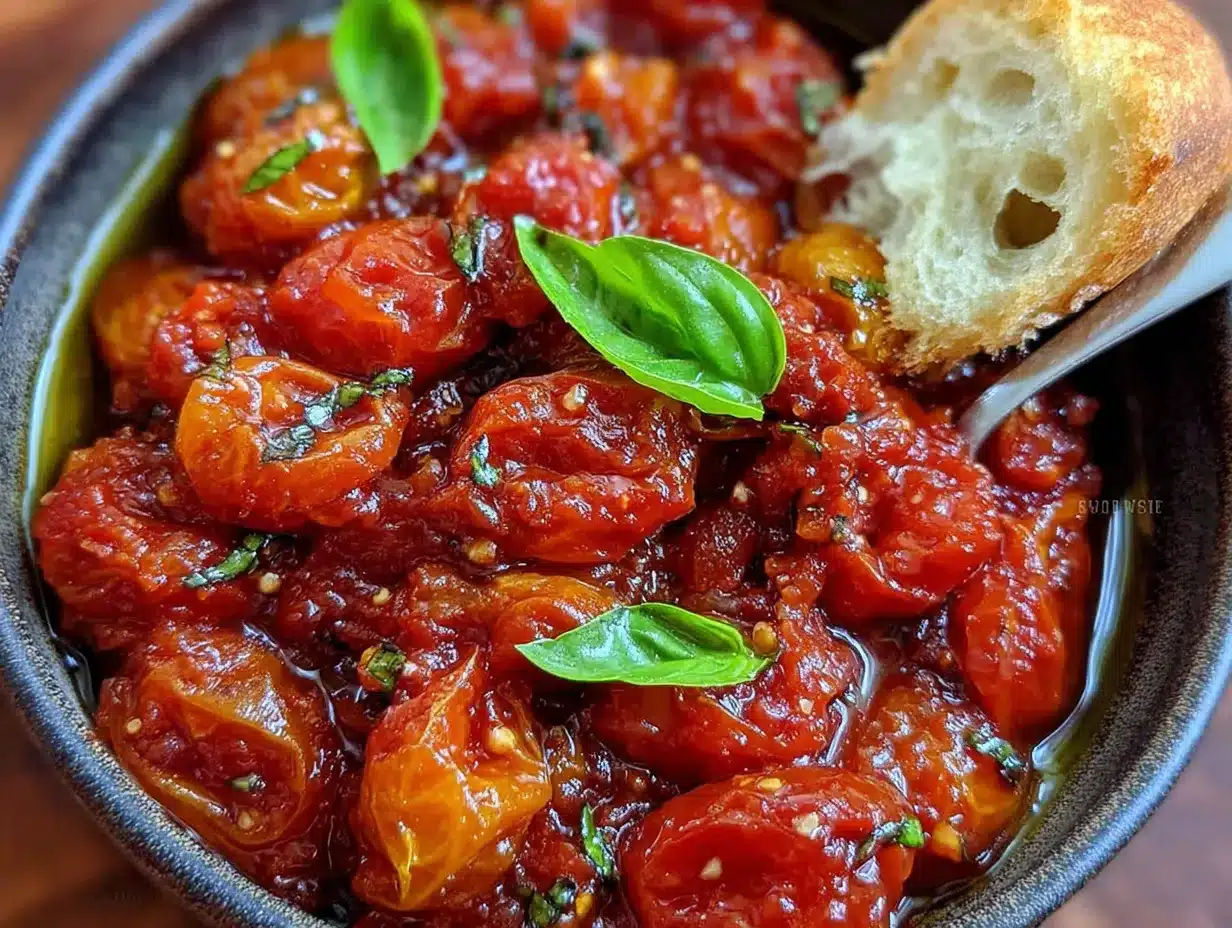
- 1/2 cup fresh basil leaves, loosely packed — Not dried. Dried basil won’t give you that fresh, bright finish. Look for basil with bright green leaves and no dark spots. If you have a basil plant, this is the perfect recipe for using up a bunch.
- 1 tablespoon balsamic vinegar — This is my secret ingredient. It doesn’t make the sauce taste like vinegar. It just rounds out the acidity and adds a subtle sweetness. Use a good aged balsamic if you have it.
- 1/4 teaspoon red pepper flakes (optional) — For a little warmth. I add this about half the time, depending on my mood. It doesn’t make the sauce spicy, just more interesting.
- Extra basil and olive oil for garnish — Because we eat with our eyes first.
Substitution Notes: If you’re avoiding nightshades, this recipe obviously won’t work. But if you just need a dairy-free or gluten-free sauce, you’re already good. This sauce is naturally both. For a lower-sodium version, use no-salt-added canned tomatoes and adjust the salt at the end.
Equipment Needed
You don’t need a fully stocked professional kitchen for this one. Here’s what you’ll actually use:
- Rimmed baking sheet — A half-sheet pan is perfect. Make sure it has sides so the tomato juices don’t run off into your oven. I’ve made the mistake of using a flat cookie sheet before. It was not fun to clean.
- Parchment paper or silicone baking mat — Not strictly necessary, but it makes cleanup so much easier. The tomatoes will release some liquid that can stick to the pan.
- Blender or immersion blender — A regular countertop blender gives you the smoothest result. I use my Vitamix, but any blender will work. An immersion blender is fine too, though the sauce won’t be quite as silky. If using an immersion blender, make sure you use a tall container to avoid splatters.
- Large skillet or saucepan — For simmering the sauce after blending. A 12-inch skillet works great because it gives the sauce room to reduce slightly.
- Chef’s knife and cutting board — For mincing the basil and any other prep.
- Wooden spoon or silicone spatula — For stirring. I prefer wood because it doesn’t scratch my pans.
- Measuring spoons — For the olive oil, salt, and vinegar. Eyeballing is fine for most things, but measuring helps with consistency.
If you don’t have a blender, you can use a food processor. The texture will be a bit chunkier, which some people actually prefer. And if you don’t have a rimmed baking sheet, a 9×13 baking dish works in a pinch—just spread the tomatoes out as much as possible.
Preparation Method
This is where the magic happens. Follow these steps, and you’ll end up with a sauce that tastes like you spent hours stirring a pot on the stove. Spoiler: you didn’t.
- Preheat your oven to 400°F (200°C). Give it a full 15 to 20 minutes to come to temperature. A hot oven is important for getting good caramelization on the tomatoes.
- Prepare the tomatoes. Open both cans of whole peeled tomatoes. Pour them into a colander set over a bowl. Let them drain for about 5 minutes. You want most of the liquid to come off, but don’t squeeze them dry. Reserve about a quarter cup of that liquid. It’s full of flavor and you’ll use it later.
- Arrange on the baking sheet. Line your rimmed baking sheet with parchment paper or a silicone mat. Spread the drained tomatoes in a single layer. Tuck the peeled garlic cloves in between the tomatoes. Drizzle everything with the 3 tablespoons of olive oil. Sprinkle with the kosher salt and black pepper. Use your hands to toss everything gently, making sure the oil and seasonings coat everything evenly.
- Roast. Place the baking sheet on the middle rack of your oven. Roast for 35 to 40 minutes, until the tomatoes are starting to brown around the edges and the garlic is soft and golden. You’ll see some caramelization on the tomatoes, and the kitchen will smell incredible. Halfway through, give the pan a gentle shake to redistribute everything.
- Cool slightly. Remove the baking sheet from the oven and let it sit for about 5 minutes. The tomatoes will be very hot, and blending them immediately can cause steam to build up and blow the lid off your blender. Trust me on this one. I learned the hard way.
- Blend. Carefully transfer the roasted tomatoes and garlic to your blender. Add the reserved tomato liquid, the tomato paste, the balsamic vinegar, and the red pepper flakes if using. Start blending on low speed, then gradually increase to high. Blend for about 30 to 45 seconds, until the sauce is completely smooth. If you prefer a chunkier sauce, pulse a few times instead of blending continuously.
- Finish with basil. Add the fresh basil leaves to the blender. Pulse 3 or 4 times, just until the basil is incorporated. You want to see tiny green flecks throughout the sauce. Don’t over-blend here, or the basil will turn dark and lose its fresh flavor.
- Simmer. Pour the sauce into a large skillet or saucepan. Bring it to a gentle simmer over medium heat. Let it cook for 10 to 15 minutes, stirring occasionally. This step thickens the sauce slightly and melds all the flavors together. Taste it at the 10-minute mark and adjust the salt if needed. I usually add another pinch at this point.
- Serve or store. Remove from heat. The sauce is ready to use immediately. If you’re storing it, let it cool completely before transferring to containers.
Important note: The sauce will look a bit thin right after blending. Don’t worry. It thickens as it simmers. If you want an even thicker sauce, let it simmer for 20 minutes instead of 15. Just keep an eye on it and stir occasionally so it doesn’t stick to the bottom of the pan.
Cooking Tips & Techniques
I’ve made this sauce enough times to know where things can go wrong. Here’s what I’ve learned so you don’t have to make the same mistakes:
Don’t crowd the pan. If you’re doubling the recipe, use two baking sheets instead of one. Overcrowding traps steam, and the tomatoes will braise instead of roast. You want caramelization, not steamed tomatoes. They should have some space between them on the pan.
Peel the garlic, but leave it whole. I know peeling garlic is annoying. But if you leave the skins on, they’ll get stuck in the blender and you’ll have to fish them out. Just peel them. And leave them whole—minced garlic burns too quickly in the oven. Whole cloves soften into sweet, spreadable goodness.
Watch the basil. Fresh basil is delicate. If you blend it too long, it turns into a dark, sad-looking paste. Pulse it in at the end, just until it’s broken down. You want those little green specks throughout the sauce. That’s where the brightness lives.
Taste as you go. I know this sounds basic, but I’ve made sauces that ended up too salty because I didn’t taste them until the end. Taste the sauce after blending, after simmering, and right before serving. Your palate is the best tool you have.
Make it ahead. This sauce actually gets better after a day in the fridge. The flavors meld and deepen overnight. So if you’re planning a dinner party, make this the day before. Your future self will thank you.
My biggest failure: The first time I made this, I forgot to drain the tomatoes. The sauce was watery and thin, and no amount of simmering could fix it. It still tasted good, but it was more like tomato soup than sauce. Drain your tomatoes. It matters.
Variations & Adaptations
One of the best things about this sauce is how flexible it is. Here are some ways to make it your own:
- Herb Swap: If you don’t have basil, try fresh oregano or a mix of basil and parsley. I’ve used thyme sprigs during roasting (remove them before blending) and it adds a lovely earthy note.
- Roasted Red Pepper Addition: Add one roasted red pepper (from a jar works fine) to the blender with the tomatoes. It adds a subtle sweetness and a beautiful color. I did this accidentally once when I had leftover peppers, and it became my new favorite version.
- Creamy Version: After simmering, stir in 2 to 3 tablespoons of heavy cream or full-fat coconut milk. It turns the sauce into something velvety and luxurious. Perfect for when you want a richer pasta dish.
- Spicy Kick: Add a whole dried chili or a teaspoon of Calabrian chili paste to the tomatoes before roasting. The heat infuses into the oil and gives the sauce a gentle warmth. I do this when I’m making the sauce for Greek chicken bowls.
- Smoky Twist: Roast the tomatoes on a sheet pan with a halved onion and a whole head of garlic (cut in half crosswise). The onion adds sweetness, and the roasted garlic gets even more mellow. Squeeze the roasted garlic cloves out of their skins before blending.
- Vegan and Dairy-Free: This sauce is naturally vegan and dairy-free as written. Just make sure your balsamic vinegar doesn’t contain any added honey or dairy. Most don’t, but it’s worth checking.
I once made a version with roasted cherry tomatoes instead of canned whole tomatoes, and it was incredible. The cherry tomatoes have a higher sugar content, so they caramelize even more. If you have fresh summer tomatoes, by all means, use them. Just roast them a little longer—about 45 minutes—since they’re smaller and need more time to soften.
Serving & Storage Suggestions
This sauce is incredibly versatile, and I’ve used it in more ways than I can count. Here are my favorites:
Serving: Toss it with al dente pasta—spaghetti, rigatoni, or pappardelle all work beautifully. The sauce clings to ridges and holes in pasta shapes, so I prefer something with texture. Serve it hot, topped with fresh basil leaves and a drizzle of good olive oil. A sprinkle of Parmesan or pecorino cheese is optional but highly recommended. This sauce also works wonders as a base for Crockpot Salsa Chicken Tacos, spread on a pizza crust instead of traditional pizza sauce, or spooned over grilled chicken or fish. It’s also fantastic as a dipping sauce for crusty bread or roasted vegetables.
Storage: Let the sauce cool completely before storing. Transfer it to an airtight container and refrigerate for up to 5 days. The flavor actually improves after a day or two as the ingredients meld together. For longer storage, pour the cooled sauce into freezer-safe bags or containers. Leave about an inch of headspace for expansion. Freeze for up to 3 months. I like to freeze it in 2-cup portions so I can thaw exactly what I need.
Reheating: Thaw frozen sauce overnight in the refrigerator. Reheat it gently in a saucepan over medium-low heat, stirring occasionally. If the sauce seems too thick after thawing, add a splash of pasta water or chicken broth to thin it out. You can also reheat it directly from frozen in a covered skillet over low heat, adding a few tablespoons of water to prevent sticking. It takes about 10 to 15 minutes to thaw and heat this way.
Flavor Development: This sauce is one of those rare recipes that tastes better the next day. The garlic mellows further, the basil infuses deeper, and everything settles into a harmonious balance. If you can, make it a day ahead. Your taste buds will thank you.
Nutritional Information & Benefits
This sauce is not just delicious—it’s also packed with good-for-you ingredients. Here’s a rough breakdown per serving (based on about 1/2 cup of sauce):
- Calories: Approximately 110
- Total Fat: 7g (mostly from olive oil, which is heart-healthy monounsaturated fat)
- Sodium: 480mg (can be reduced by using no-salt-added tomatoes)
- Total Carbohydrates: 10g
- Dietary Fiber: 2g
- Sugars: 6g (natural sugars from tomatoes)
- Protein: 2g
- Vitamin C: 20% of the Daily Value
- Vitamin A: 15% of the Daily Value
- Iron: 8% of the Daily Value
- Potassium: 10% of the Daily Value
Health Highlights: Tomatoes are rich in lycopene, a powerful antioxidant linked to heart health and reduced inflammation. Cooking tomatoes actually increases the bioavailability of lycopene, so this roasted sauce is especially beneficial. Garlic is known for its immune-boosting properties, and olive oil provides anti-inflammatory benefits. Basil contains essential oils with antibacterial properties and adds a fresh dose of vitamin K. This sauce is naturally gluten-free, dairy-free, and vegan, making it suitable for a wide range of dietary needs.
Dietary Considerations: If you’re watching your sodium intake, use no-salt-added canned tomatoes and reduce the added salt to 1/2 teaspoon. You can always add more at the end. The sauce is also low in added sugars, with all sweetness coming naturally from the roasted tomatoes and balsamic vinegar.
Conclusion
I never thought a sauce made with jarred garlic would win me over. But here I am, making this bright garlicky roasted tomato basil sauce on repeat, telling everyone I know about it. It’s proof that sometimes the simplest techniques—like roasting instead of sautéing—can completely transform a dish. This sauce is bright without being acidic, garlicky without being harsh, and rich without being heavy. It’s exactly what a good tomato sauce should be.
I hope you give this recipe a try. Make it for a weeknight dinner when you need something comforting. Make it for a weekend meal when you want to impress without stress. Make it your own by adding your favorite herbs or a splash of cream. And when you do, come back and tell me how it went. I love hearing about your kitchen victories—and your happy accidents too.
If you make this sauce, tag me in your photos or leave a comment below. I read every single one, and I promise I’ll answer any questions you have. Now go preheat that oven. You’ve got some roasting to do.
Frequently Asked Questions
Can I use fresh tomatoes instead of canned?
Absolutely. Use about 2 pounds of ripe Roma or San Marzano tomatoes. Cut them in half lengthwise and roast them alongside the garlic. You may need to roast them a bit longer—about 45 to 50 minutes—until they’re soft and starting to caramelize. The flavor will be even more vibrant with fresh summer tomatoes.
Can I make this sauce oil-free?
You can, but the texture and flavor will change. Olive oil helps the tomatoes caramelize and adds richness. If you want to reduce the oil, use 1 tablespoon instead of 3. For an oil-free version, roast the tomatoes on a silicone mat without any oil, and add a splash of water or vegetable broth when blending. The sauce will be thinner and less rich, but still tasty.
How do I prevent the sauce from being too acidic?
Roasting the tomatoes naturally reduces their acidity. If your sauce still tastes too acidic after simmering, add a pinch of sugar or a splash more balsamic vinegar. The sugar balances the acid, and the vinegar adds complexity that masks the sharpness. I’ve also added a small peeled carrot to the blender before—it adds sweetness without changing the flavor.
Can I use dried basil instead of fresh?
I don’t recommend it for this recipe. Fresh basil is what gives the sauce its bright, fresh finish. Dried basil has a different flavor profile and won’t provide that same pop. If you don’t have fresh basil, try fresh parsley or a combination of fresh oregano and thyme. Or simply skip the herb step and finish the sauce with a drizzle of good olive oil.
How long does this sauce keep in the freezer?
Properly stored, this sauce will keep in the freezer for up to 3 months. Use freezer-safe bags or containers, and leave some headspace for expansion. Label the containers with the date so you know what’s in there. To thaw, transfer the container to the refrigerator overnight, or reheat directly from frozen in a covered skillet over low heat.
Pin This Recipe!
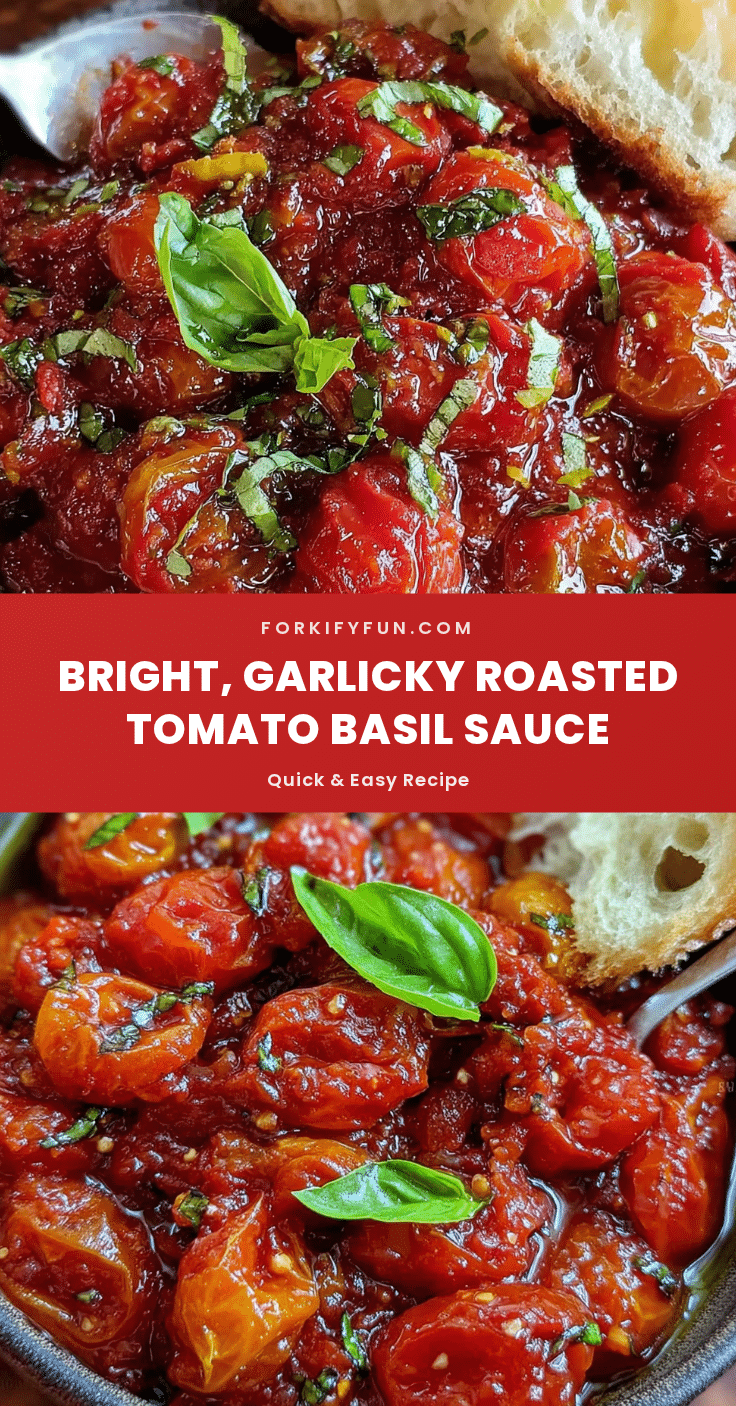
Best Bright Garlicky Roasted Tomato Basil Sauce Recipe
This bright garlicky roasted tomato basil sauce is simple enough for a Tuesday night pasta dinner but impressive enough to serve to guests. Roasting whole garlic cloves alongside tomatoes transforms the flavor into a deep, caramelized sweetness that tastes fresh and bright.
- Prep Time: 10 minutes
- Cook Time: 40 minutes
- Total Time: 50 minutes
- Yield: 4 servings 1x
- Category: Sauce
- Cuisine: Italian
Ingredients
- 2 cans (28 ounces each) whole peeled tomatoes, drained (reserve 1/4 cup liquid)
- 8 to 10 cloves garlic, peeled
- 3 tablespoons extra virgin olive oil
- 1 teaspoon kosher salt
- 1/2 teaspoon black pepper, freshly ground
- 1 tablespoon tomato paste
- 1/2 cup fresh basil leaves, loosely packed
- 1 tablespoon balsamic vinegar
- 1/4 teaspoon red pepper flakes (optional)
- Extra basil and olive oil for garnish
Instructions
- Preheat your oven to 400°F (200°C).
- Drain the canned tomatoes in a colander for about 5 minutes. Reserve about 1/4 cup of the liquid.
- Line a rimmed baking sheet with parchment paper or a silicone mat. Spread the drained tomatoes in a single layer. Tuck the peeled garlic cloves in between the tomatoes. Drizzle with olive oil and sprinkle with salt and pepper. Toss gently to coat.
- Roast on the middle rack for 35 to 40 minutes, until tomatoes are browned around the edges and garlic is soft and golden. Halfway through, shake the pan gently.
- Remove from oven and let cool for about 5 minutes.
- Transfer the roasted tomatoes and garlic to a blender. Add the reserved tomato liquid, tomato paste, balsamic vinegar, and red pepper flakes (if using). Blend starting on low, then increasing to high, for 30 to 45 seconds until smooth.
- Add the fresh basil leaves and pulse 3 to 4 times until incorporated but still flecked with green.
- Pour the sauce into a large skillet or saucepan. Bring to a gentle simmer over medium heat and cook for 10 to 15 minutes, stirring occasionally. Taste and adjust salt if needed.
- Remove from heat. Serve immediately or let cool completely before storing.
Notes
Don’t crowd the pan if doubling the recipe—use two baking sheets. Peel garlic but leave whole. Watch the basil: pulse at the end to keep it bright. Taste as you go. The sauce thickens as it simmers. Make ahead for better flavor.
Nutrition
- Serving Size: 1/2 cup
- Calories: 110
- Sugar: 6
- Sodium: 480
- Fat: 7
- Saturated Fat: 1
- Carbohydrates: 10
- Fiber: 2
- Protein: 2
Keywords: roasted tomato sauce, garlic sauce, basil sauce, homemade pasta sauce, easy tomato sauce, bright garlicky sauce


