Black velvet cupcakes sound like something out of a midnight dream, right? I want that rich, mysterious flavor right now, and I’ve realized this Halloween, it’s not just about spooky decorations but the perfect treat that steals the scene. The deep, dark crumb contrasted with the pale frosting swirling into spider webs—honestly, it’s a little thrill every time you bite in. I’ve tried plenty of chocolate cupcakes with a hint of something different, but the black velvet’s subtle cocoa with that striking black hue always gets me wondering how something so simple can feel so special.
The frosting is where I usually get fidgety—too sweet, too stiff, or just plain boring. But spider web frosting? It’s fun, a little cheeky, and surprisingly easy once you get the hang of the piping. I remember this one Halloween when I brought these cupcakes to a friend’s party, and people kept asking if I’d bought them from a bakery. No way, I thought, just a little patience and the right recipe.
There’s something quietly satisfying about watching that thin black web stretch perfectly across the creamy white frosting, like a tiny masterpiece. And the best part? These cupcakes don’t just look like Halloween—they taste like it, too. That’s why I keep coming back to this recipe year after year. It’s the kind of thing that makes you want to linger around the dessert table, savoring every bite and thinking, maybe, just maybe, I’ll make these for the next holiday too.
Why You’ll Love This Recipe
- Quick & Easy: These black velvet cupcakes come together in under an hour, perfect for last-minute Halloween parties or when you’re craving something festive but don’t have days to spare.
- Simple Ingredients: No obscure baking powders or exotic extracts here—just pantry staples like cocoa powder, buttermilk, and a touch of black food coloring for that signature color.
- Perfect for Halloween Celebrations: The spider web frosting turns an ordinary cupcake into an eye-catching Halloween treat that’s great for school parties, office potlucks, or cozy nights with the family.
- Crowd-Pleaser: Kids love the spooky look, while adults appreciate the balanced chocolate flavor and moist crumb. It’s one of those recipes that gets compliments without fuss.
- Unbelievably Delicious: The black velvet base is slightly less sweet than traditional chocolate cupcakes, letting the cocoa and buttermilk shine through, while the creamy frosting adds the right amount of richness.
- This recipe stands out because I blend just the right amount of cocoa with black food coloring for that intense, almost gothic tone without bitterness. Plus, the spider web tutorial is foolproof—even if you’re not a pro at piping.
- Honestly, it’s a recipe you can trust to impress without stress—and that’s a rare find in Halloween baking.
What Ingredients You Will Need
This recipe uses simple, wholesome ingredients to deliver bold flavor and that perfect moist texture without any fuss. Most are pantry staples, so you might already have everything ready to go.
- For the Black Velvet Cupcakes:
- All-purpose flour – 1 ½ cups (190g), sifted for a tender crumb
- Unsweetened cocoa powder – ¼ cup (25g), choose a good quality Dutch-processed cocoa for smooth flavor
- Baking soda – 1 teaspoon, for that gentle rise
- Salt – ½ teaspoon, balances the sweetness
- Unsalted butter – ½ cup (115g), softened (Room temperature butter is key here!)
- Granulated sugar – 1 cup (200g), for sweetness and structure
- Large eggs – 2, room temperature helps the batter mix better
- Buttermilk – ¾ cup (180ml), adds tanginess and moisture
- Vanilla extract – 1 teaspoon, pure is best
- Black gel food coloring – 1 teaspoon (adjust to get that deep black shade without affecting taste)
- For the Spider Web Frosting:
- Cream cheese – 8 oz (225g), softened (look for full-fat for richness)
- Unsalted butter – ½ cup (115g), softened
- Powdered sugar – 3 cups (360g), sifted for smooth frosting
- Vanilla extract – 1 teaspoon
- Milk – 1-2 tablespoons (15-30ml), to thin the frosting if needed
- Black gel food coloring – a small amount for the spider web piping
Pro tip: I recommend using AmeriColor gel colors—they’re vibrant and don’t alter the batter’s texture. Also, if you want a dairy-free version, you can swap the cream cheese for a vegan cream cheese alternative and use plant-based butter.
Equipment Needed
- Standard 12-cup muffin tin – for perfect cupcake sizing
- Paper cupcake liners – helps with easy removal and cleanup
- Electric hand mixer or stand mixer – for smooth batter and frosting
- Mixing bowls – medium and large sizes
- Measuring cups and spoons – accuracy is key with baking
- Rubber spatula – for scraping down the bowl
- Piping bags and round piping tips (small size) – essential for the spider web design; if you don’t have a piping bag, a small plastic sandwich bag with a snipped corner works just fine
- Toothpick or skewer – for dragging the spider web lines
Personally, I like using my stand mixer for the frosting because it gives me that silky texture without much effort. If you’re on a budget, a hand mixer like the KitchenAid Classic will get the job done just as well. Also, keep your piping tips clean—rinse immediately after use to avoid clogging.
Preparation Method
- Preheat and Prep: Set your oven to 350°F (175°C). Line your muffin tin with cupcake liners and set aside.
- Mix Dry Ingredients: In a medium bowl, sift together the all-purpose flour, cocoa powder, baking soda, and salt. This ensures no lumps and an even distribution of leavening agents.
- Cream Butter and Sugar: In a large mixing bowl, beat the softened butter and granulated sugar on medium speed until light and fluffy. This usually takes about 3-4 minutes and is key for a tender crumb.
- Add Eggs: Crack in the eggs one at a time, beating well after each addition. This step helps the batter emulsify properly.
- Incorporate Wet Ingredients: Mix in the vanilla extract and black gel food coloring until the batter is a deep, uniform black. It might look intimidating but trust the color—it sets the mood.
- Alternate Adding Dry and Buttermilk: Add the dry ingredients in three batches, alternating with the buttermilk in two batches, starting and ending with the dry. Mix gently on low speed to avoid overworking the batter.
- Fill Cupcake Liners: Spoon the batter evenly into liners, filling about ⅔ full to allow room for rising.
- Bake: Place in the preheated oven and bake for 18-22 minutes. Check doneness by inserting a toothpick in the center—if it comes out clean or with just a few crumbs, they’re done.
- Cool: Let cupcakes cool in the pan for 5 minutes before transferring to a wire rack to cool completely. Frosting warm cupcakes leads to melty disasters.
- Make the Frosting: Beat the softened cream cheese and butter together until smooth and creamy. Gradually add powdered sugar, then vanilla extract. If the frosting is too stiff, add milk a teaspoon at a time until you reach spreadable consistency.
- Frost Cupcakes: Using an offset spatula or piping bag with a large round tip, frost the cooled cupcakes with a smooth white layer.
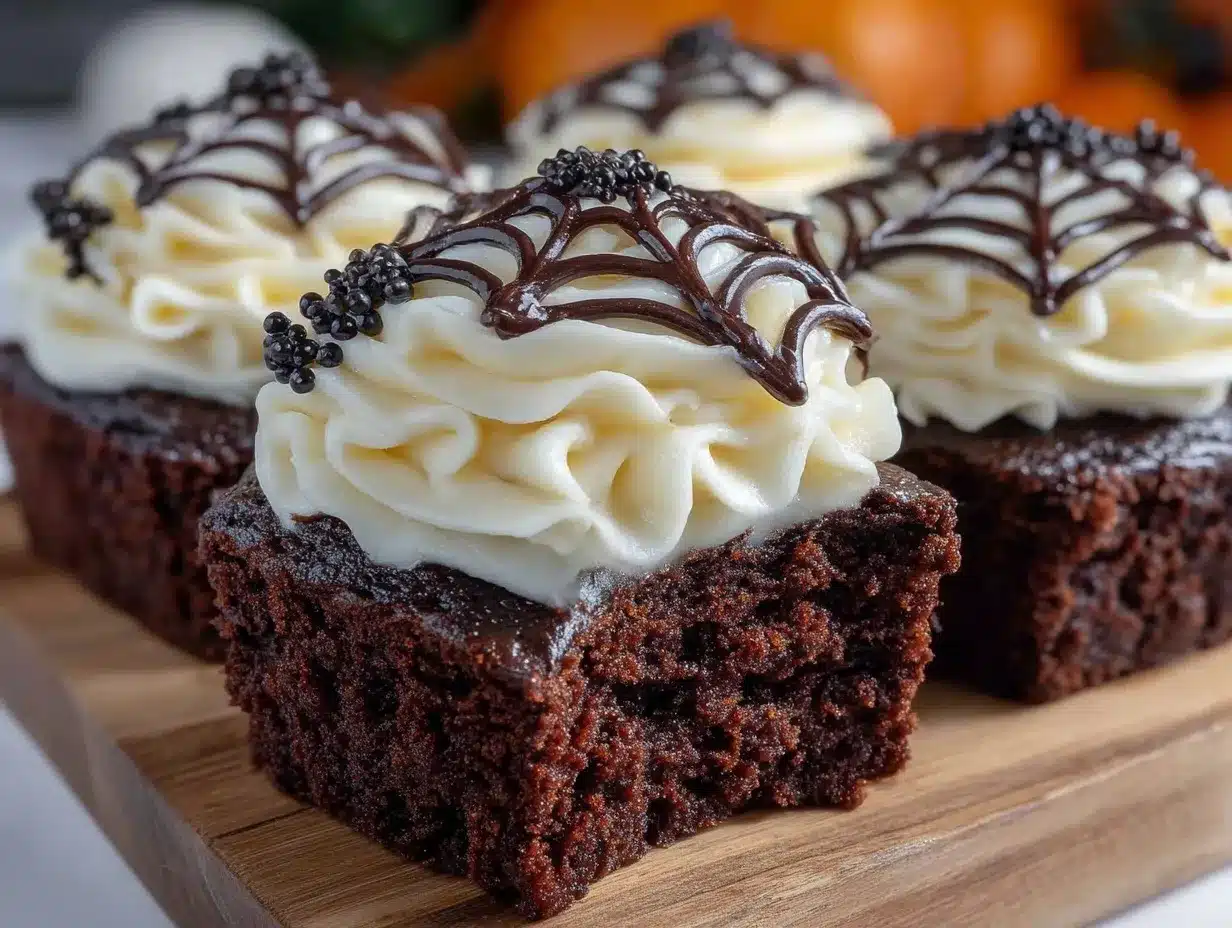
- Create the Spider Web: Fill a piping bag with black-tinted frosting and pipe concentric circles on top of the white frosting. Use a toothpick to drag lines from the center outward to create the web effect, wiping the toothpick between each drag.
Tip: Don’t rush the spider web step. Let your hand stay steady and go slow for the best results. I once tried to speed through it, and it looked more like a messy scribble than a web—lesson learned!
Cooking Tips & Techniques
- Room Temperature Ingredients: Butter, eggs, and buttermilk should be at room temp for smoother mixing and better texture.
- Don’t Overmix: When combining wet and dry ingredients, mix just until combined to avoid dense cupcakes.
- Use Gel Food Coloring: Liquid colors can thin your batter, whereas gel colors give that vivid black without changing consistency.
- Test Oven Temperature: Oven temps can vary. If your cupcakes are browning too fast, lower the heat slightly or tent with foil.
- Frosting Consistency: If your cream cheese frosting is too thick to pipe, add milk very gradually. Too thin frosting can run, so balance is key.
- Practice Piping: If you’re new to frosting designs, practice the spider web on parchment paper first. This helped me stop feeling intimidated by piping bags.
- Multitasking: While cupcakes bake, prepare your frosting so you’re ready to decorate as soon as they cool.
Variations & Adaptations
- Dietary Adaptations: For a gluten-free version, substitute the all-purpose flour with a 1:1 gluten-free baking flour blend.
- Seasonal Twists: Add a teaspoon of pumpkin pie spice to the batter for an autumnal nod that pairs wonderfully with the cocoa.
- Flavor Variations: Swap the cream cheese frosting with whipped chocolate ganache for a richer, more decadent cupcake.
- Alternative Designs: Instead of a spider web, try piping little black bats or pumpkins using colored frosting for a fun Halloween display.
- Personal Favorite: I once added a small dollop of raspberry jam in the center before baking—surprise flavor that cut the richness nicely and made the cupcakes extra special.
Serving & Storage Suggestions
Serve these black velvet cupcakes at room temperature to enjoy the full depth of flavor and creamy frosting texture. They pair surprisingly well with a dark roast coffee, like the brown sugar shaken espresso recipe I love for a little caffeine kick alongside dessert.
Store cupcakes in an airtight container in the refrigerator for up to 4 days. The frosting holds up well, but let the cupcakes come back to room temperature before serving for the best taste. You can also freeze unfrosted cupcakes for up to 3 months; thaw completely before frosting.
Reheating gently in a microwave for 10-15 seconds can bring back that fresh-baked feeling, but be careful not to melt the frosting. Flavors mellow beautifully overnight, so these cupcakes often taste even better the next day.
Nutritional Information & Benefits
Each black velvet cupcake (including frosting) roughly contains 320 calories, 15g fat, 40g carbohydrates, and 3g protein. These are indulgent treats, but the use of unsweetened cocoa powder provides antioxidants and minerals like iron and magnesium.
The buttermilk adds a subtle tang and tender crumb without relying on heavy oils. Cream cheese frosting offers a dose of calcium and protein, though it’s best enjoyed in moderation.
For those watching carbs, you could experiment with almond flour and a sugar substitute, but this classic recipe keeps things simple and satisfying. If you are avoiding dairy, the substitutions mentioned earlier keep it accessible while maintaining the festive spirit.
Conclusion
These Perfect Black Velvet Halloween Cupcakes with Spider Web Frosting are my go-to for when I want a treat that’s both spooky and sophisticated. The rich black crumb paired with that creamy, tangy frosting and the playful web design makes every bite a little celebration of the season.
Feel free to tweak the decorating or add your own twist—whether that’s a hint of spice or a surprise filling. I love how this recipe brings people together around a shared delight, and I hope it becomes a favorite in your Halloween baking lineup, too.
If you try it, I’d love to hear how your cupcakes turn out or what personal touches you added. Baking is more fun when it’s shared, after all. So get that piping bag ready and have some spooky fun!
Frequently Asked Questions
- Can I make these cupcakes ahead of time? Yes! You can bake the cupcakes up to 2 days before frosting and keep them stored in an airtight container at room temperature.
- What if I don’t have buttermilk? You can make a substitute by adding 1 tablespoon of lemon juice or vinegar to ¾ cup of milk. Let it sit for 5 minutes before using.
- How do I get the frosting to a perfect consistency for piping? Beat the frosting well and add milk gradually if it’s too thick. It should be firm enough to hold shape but soft enough to pipe smoothly.
- Can I use regular liquid food coloring instead of gel? It’s better to use gel food coloring; liquid can thin the batter and affect texture and color intensity.
- How do I store leftover frosted cupcakes? Keep them in an airtight container in the fridge for up to 4 days. Bring to room temperature before serving for best flavor.
Pin This Recipe!
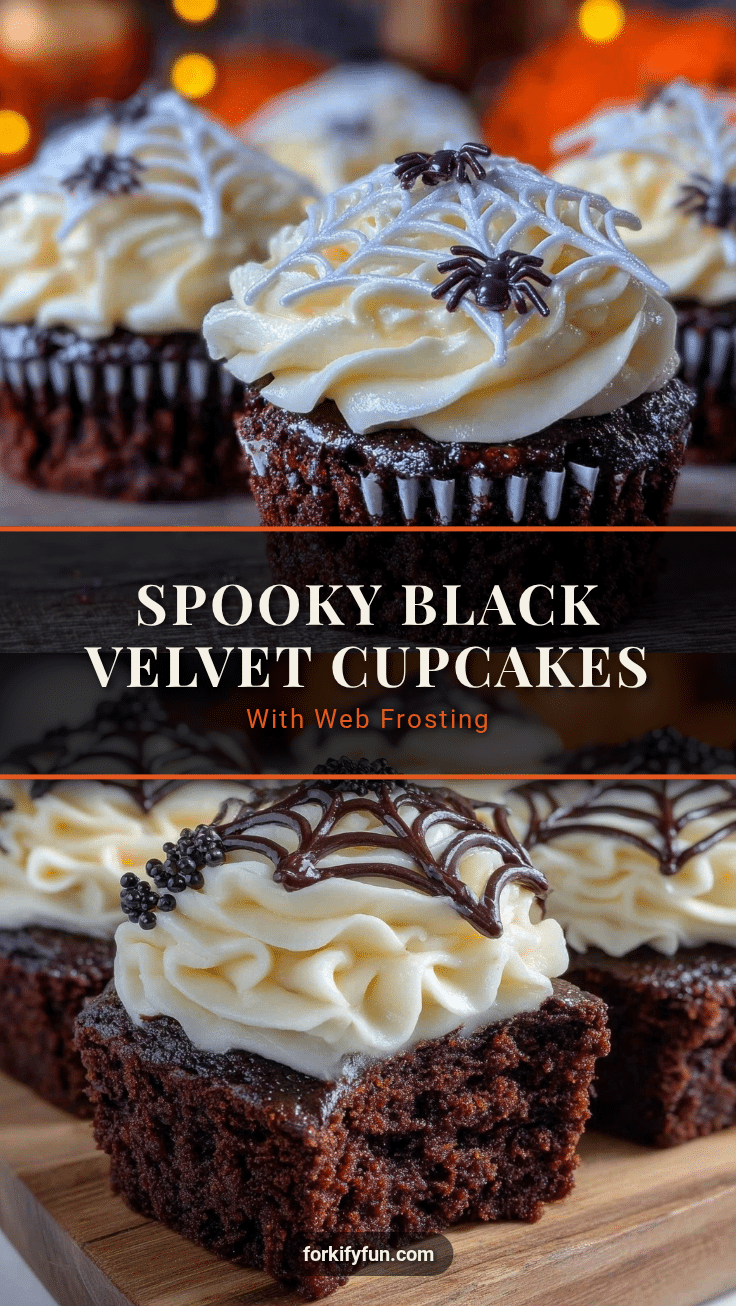
Perfect Black Velvet Halloween Cupcakes with Easy Spider Web Frosting Tutorial
These black velvet cupcakes feature a rich, dark cocoa crumb with a creamy cream cheese frosting decorated with a fun spider web design, perfect for Halloween celebrations.
- Prep Time: 20 minutes
- Cook Time: 20 minutes
- Total Time: 40 minutes
- Yield: 12 cupcakes
- Category: Dessert
- Cuisine: American
Ingredients
- All-purpose flour – 1 ½ cups (190g), sifted
- Unsweetened cocoa powder – ¼ cup (25g), Dutch-processed
- Baking soda – 1 teaspoon
- Salt – ½ teaspoon
- Unsalted butter – ½ cup (115g), softened
- Granulated sugar – 1 cup (200g)
- Large eggs – 2, room temperature
- Buttermilk – ¾ cup (180ml)
- Vanilla extract – 1 teaspoon
- Black gel food coloring – 1 teaspoon
- Cream cheese – 8 oz (225g), softened
- Unsalted butter – ½ cup (115g), softened
- Powdered sugar – 3 cups (360g), sifted
- Vanilla extract – 1 teaspoon
- Milk – 1-2 tablespoons (15-30ml)
- Black gel food coloring – small amount for spider web piping
Instructions
- Preheat oven to 350°F (175°C). Line a 12-cup muffin tin with cupcake liners.
- In a medium bowl, sift together flour, cocoa powder, baking soda, and salt.
- In a large bowl, beat softened butter and granulated sugar on medium speed until light and fluffy, about 3-4 minutes.
- Add eggs one at a time, beating well after each addition.
- Mix in vanilla extract and black gel food coloring until batter is uniformly black.
- Add dry ingredients in three batches, alternating with buttermilk in two batches, starting and ending with dry ingredients. Mix gently on low speed.
- Fill cupcake liners about 2/3 full with batter.
- Bake for 18-22 minutes or until a toothpick inserted in the center comes out clean or with a few crumbs.
- Cool cupcakes in the pan for 5 minutes, then transfer to a wire rack to cool completely.
- Beat cream cheese and butter together until smooth and creamy.
- Gradually add powdered sugar and vanilla extract, mixing until smooth. Add milk a teaspoon at a time if frosting is too stiff.
- Frost cooled cupcakes with a smooth white layer using an offset spatula or piping bag with a large round tip.
- Fill a piping bag with black-tinted frosting and pipe concentric circles on top of the white frosting.
- Use a toothpick to drag lines from the center outward to create a spider web effect, wiping the toothpick between each drag.
Notes
Use gel food coloring for best color without thinning batter. Room temperature ingredients improve texture. Practice piping spider web on parchment paper first. Store frosted cupcakes in airtight container in fridge up to 4 days; bring to room temperature before serving. For dairy-free, substitute cream cheese and butter with vegan alternatives. For gluten-free, use a 1:1 gluten-free baking flour blend.
Nutrition
- Serving Size: 1 cupcake
- Calories: 320
- Sugar: 28
- Sodium: 210
- Fat: 15
- Saturated Fat: 9
- Carbohydrates: 40
- Fiber: 2
- Protein: 3
Keywords: black velvet cupcakes, Halloween cupcakes, spider web frosting, cream cheese frosting, easy Halloween dessert, spooky cupcakes


